
On to the tutorial!
I'm a fan of nail art. It's just so fun to do and you get to use so many polishes at once. Win! I created this mani that I like to call, Fantasy Flames, mainly because it looks like magical fire.

To achieve this look, I used a dry marbling technique, which basically consists of glopping various polishes on your nail and then swirling them around with a dotting tool, pin, toothpick, or something similar with a fine point. The following is what I did to create this nail art:
Step 1
Gather up your polish arsenal. You can use whatever colors you prefer. I went with 4 -- one for a base color and 3 to make the flames. Any more than that and I felt it might look too jumbly, but feel free to experiment.
 |
| From left: Zoya Raven, Essie Sexy Divide, Sally Hansen Xtreme Wear Ultraviolet, Ozotic Sugar #903 |
Step 2
Start with clean, oil-free nails and apply one layer of base coat. I used OPI Nail Envy for this.

Step 3
Ready your polishes. You'll need to work quickly for this look. Loosen the caps on each polish you're planning to use. You won't have time to open and close each bottle while working as you don't want the polish to dry.

Step 4
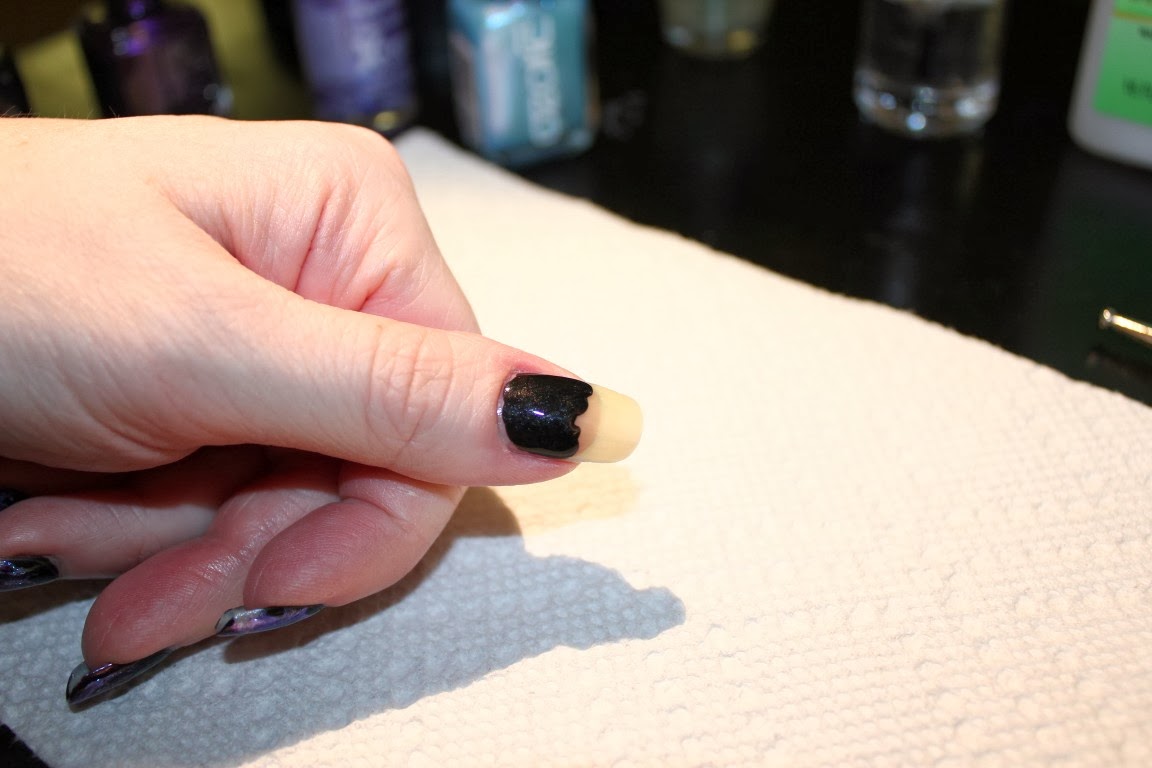
Apply your base color on half of your nail closest to your cuticle. It's not really necessary to cover the whole nail with it, but make sure it looks pretty opaque where you've applied it. I used Zoya Raven here.
Don't let it dry. Just move to the next step
Step 5
Apply a fairly thick layer of the next color in a sort of stripe below the base color so that it overlaps the base color a bit. It doesn't have to look neat. I used Sally Hansen Xtreme Wear in Ultraviolet here.

Step 6
Repeat Step 5, but with your next color and put it below the previous stripe. I used Ozotic Sugar #903.

Step 7
Next, repeat the above with your third color. I used Essie Sexy Divide for this one.

Step 8
While the polish is still wet, grab your fine tipped tool--I used a dotting tool--and begin dragging the polish around starting from the tip (if you want to create a flame look).

Step 9
Keep dragging and swirling with your fine-tipped tool until you achieve your desired look.

Step 10
If needed, clean up around the cuticle with some acetone and an angled brush. I like to use an inexpensive angled eyeliner brush for clean up.

Step 11
Let the polish dry and apply your favorite top coat. Repeat the above steps on your other nails. I think it's easier to do each nail individual so the polish doesn't dry.

Step 12
Admire your pretty nails!

I hope you'll give this look a try. It's not nearly as complex as it looks and it's a very forgiving technique; you just have to work quick enough so the polish doesn't dry.
Have questions? Feel free to comment in the box below.
Thanks for reading! :)
All the polishes used in this tutorial are from my collection.
No comments:
Post a Comment
Comments? I'd love to hear from you.